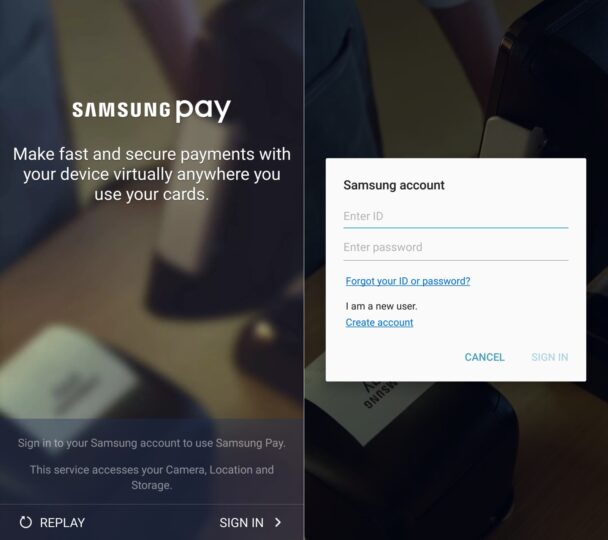
- Download Samsung Pay and log in to Samsung account
Every compatible device will have the Samsung Pay app preloaded. If you don’t have it on your device, you probably aren’t on the latest software version, in which case you should first grab the latest software update from the Settings » About device or Settings » Software update menu. Samsung Pay will also not show up on a third-party launcher, so make sure you switch back to the default launcher from the Settings » Applications menu.
The Samsung Pay app that you see on your phone is not actually the full app, so the first time you open it, you will be prompted to download the full sized Samsung Pay app. Let the download complete and view or skip the intro video that shows up.
Now, the app will ask you to sign to your Samsung account. If you have one, proceed with signing in, or make a new account if you don’t have one by selecting the necessary option from the login popup. Also note that the process of adding cards has to be repeated on each new Samsung device, as card information is only saved on the device and not synced to your Samsung account.

2. Set up verification method for using Samsung Pay
Once you have logged in, you will be asked to set a verification method for securing Samsung Pay. You can use your fingerprint for the same or set a PIN (using a fingerprint will also require a PIN as a failsafe). Once you have set up your chosen verification method, you will be given the option to add a new card.

3. Adding a credit or debit card
- Now we come to the main objective: Adding your credit or debit cards to Samsung Pay. Hit the Add card button that came up after you set your verification method, or hit the big + sign if you are in the main Samsung Pay app.

- There are two ways of adding the primary card details. You can either take a photo of your card’s front side, following which you will be asked to add information such as the CVV code and the name on the card, or you can enter all card details manually. The latter, of course, is preferable for those who remember their card details and don’t want the hassle of taking the card out of their wallet.
Note: If you use the camera to add card details, double check all fields as the phone might not always properly detect the values printed on your card. - Once you’ve added all details, hit Next and wait for the app to validate your card. This can take a while, so be patient. Should validation fail, simply try again.
- After validation is done, agree to Samsung’s terms and conditions. This will result in another round of validation.
4. Verifying the card you’re trying to add
- Based on what verification methods are employed by your credit or debit card supplier, you will be asked to verify your card after you agree to the terms and conditions. For my ICICI credit card, I get the option to verify through an OTP (one time password) sent to my registered mobile number. For some cards, the options could also include sending the OTP to your email address.
- Note: There’s also an option to call the bank, but that’s not something you should need to do unless you repeatedly fail at verification through SMS or email
- Select how you want to verify your card. No matter what option you choose, it will most likely involve entering a six or seven digit number (sent to your phone number or email) in the Samsung Pay app to complete verification.

- Once verification is done, you will be asked to sign your card. You can sign it right away or hit the LATER option. Signing isn’t necessary, as Indian consumers would be well aware, given the signatures on cards are not exactly checked by most retailers and shops in the country.

- Whether you sign or not, Samsung Pay will notify you that your card has been added. You will also get options to add another card, but just hit DONE here for the sake of following this guide.
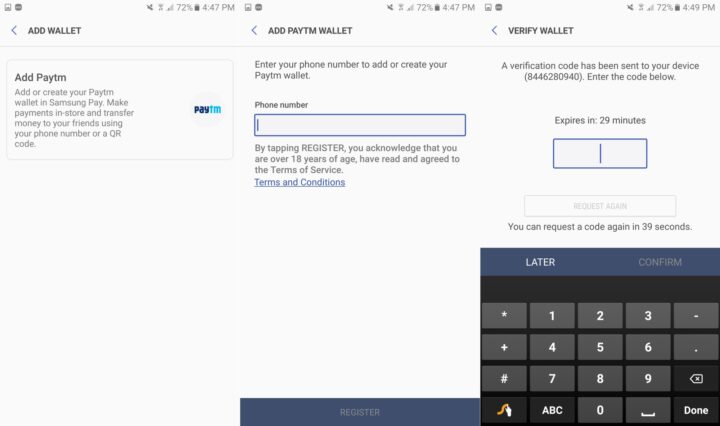
(Optional) Adding a Paytm wallet account
Samsung Pay also allows Indian users to add a Paytm wallet account, so that you can pay from your Paytm wallet balance through Samsung Pay instead of firing up the Paytm app. To add a Paytm account, hit the Wallets button in the Samsung Pay app, then hit the Add Paytm button. Enter the phone number registered to your Paytm account, hit Register, then wait for an OTP to be sent to your number. Enter the received OTP in the verification field, then hit Confirm

That’s it, folks. Now, for using Samsung Pay
You will be returned to the main Samsung Pay screen, and you should see your newly added credit or debit card here, and your Paytm account in the Wallets section. So, now that you have added your card or Paytm account, how do you pay?
To be easily and quick accessible, the Samsung Pay app will always be running on your phone. The app can be launched by swiping up from the bottom of the screen when you’re on the lock screen, home screen, and even when the phone’s display is off. Once you’ve swiped up to open Samsung Pay, you can swipe between the cards to choose the one you want to use, then either place your finger on the home button or enter your PIN to fire up the actual payment screen.
Then, simply place your phone against the top or the side of the payment terminal/card reader to begin payment. Keep in mind that the card reader might sometimes fail to properly receive information from the phone; in such cases it’s best to try again or simply pay with your card, lest you hold up the people in the queue behind you.

If you intend to use your Paytm wallet, you can scan the QR code put up at the retailer’s or show your own code to the cashier so they can scan it (if they have the necessary equipment) to make payment. You also have the option of sending money to others, by simply entering their phone number.
Where can I see my transaction history?
Whenever you use Samsung Pay to make a payment, the transaction will be added to the list of transactions for the particular card used. To see these transactions, fire up the Samsung Pay app (if you open it by swiping up from the bottom of the screen, simply swipe down again to access the main app). Then, click on the Credit/Debit cards text in the middle of the screen, then select the card you want to view details for. All transactions made via Samsung Pay will be listed here. Remember that you will need an internet connection for the transaction list to be updated, but you do not need an internet connection to use Samsung Pay for payment.

This guide will have hopefully made the process of adding cards to and using Samsung Pay simple. Should you have any doubts, don’t forget to leave a comment so that we can help you get back on the right track.
0 comments:
Post a Comment